
A couple of weeks ago I have had so much fun configuring a daily build to the project I am working on. Yes it took a long time, but once I saw that green light ticking it was totally worth it. Anyway here are some of the things I learnt about Team Build that I think are the most important:
It Requires a Permission:
Okay first of all if you are trying to right click the “Builds” folder from the “Team Explorer” and the “New Build Definition” option is inactive then you probably don’t have the right permissions. You must have the Team Foundation Server “administer a build” permission and the Team Foundation Server start/resume a build permission.
Okay first of all if you are trying to right click the “Builds” folder from the “Team Explorer” and the “New Build Definition” option is inactive then you probably don’t have the right permissions. You must have the Team Foundation Server “administer a build” permission and the Team Foundation Server start/resume a build permission.
Multiple Solutions and their dependencies:
Be aware of one solution having dependencies on another when determining the order in which they are built. For example, set Solution1 to be built before Solution2 in the case where Solution2 has a dependency on Solution1.
Be aware of one solution having dependencies on another when determining the order in which they are built. For example, set Solution1 to be built before Solution2 in the case where Solution2 has a dependency on Solution1.
Yes! insufficient space = failed builds
When selecting the build directory, ensure that there is enough space to build; insufficient space will lead to failed builds. The same goes for the drop.
When selecting the build directory, ensure that there is enough space to build; insufficient space will lead to failed builds. The same goes for the drop.
Dropping Locations
By default, the drop directory is not automatically created as a share and therefore is not accessible for publishing builds and tests results. You must manually establish a share, add write permissions to the Windows directory, and add share permissions for both the account used to run Team Foundation Build service for dropping builds and for the tester's account for publishing test results.
Each generated build will be dropped into a separate directory. You will need to ensure that the account with which build machine is configured has write access to this UNC location.
Not only builds but it deploys as well:
Yes you can configure an “AfterDropBuild” target that will copy all the output files and BLLs to any directory you want, first you have to specify a PropertyGroup that points to the directory where the files are dropped after building:
 And then create an AfterDropBuild target like that:

At the beginning of your code right under the opening tag of theitem.Using the msbuild community tasks project it becomes easy to change App.config and Web.config files as part of the build process. Install the Ms Build Community tasks on your server and you can use this code to update your App.config and Web.config keys during build. Create a new target:

2. Simply Replace files after deployment:
Create a separate configuration file for each environment and add it to the source control, then copy them in the destination directories after dropping:Add in thetwo items, one for the source of the configuration file and the other one for the destination location:


 And then create an AfterDropBuild target like that:
Different Deployments X Different Environments:
Say you have different Environments, and each environment has its own configuration file have two solutions or simply the location you are deploying to needs a specific configuration you can implement this using one these two solutions:
1. Use the MSBuild Community Tasks Project for VS
MSBuild Community Tasks Project is a community project where you can find a long list of cool MSBuild Custom Tasks that you can use within your VSTS build environments. All you have to do is install the MSBuild Tasks on your local machine and the destination drop machine, you can download if from:http://msbuildtasks.tigris.org/svn/msbuildtasks/trunk msbuildtasks --username guest.In order to use the tasks in this project, you need to import the MSBuild.Community.Tasks.Targets files:

At the beginning of your code right under the opening tag of the

2. Simply Replace files after deployment:
Create a separate configuration file for each environment and add it to the source control, then copy them in the destination directories after dropping:Add in the

Create an after drop target and then write the copy script:

If your project is a web application and you need to reset the IIS you might want to consider this:
You can use this script to reset a specific web site instead of resetting the IIS.


The command line tool TfsBuild.exe
See 1. Actually, I must say, the command line tool is really useful. You can find it at: \Common7\IDE\TFSBuild.exe and is surprisingly good. It can be called using: TfsBuild.exe start as you might have guessed, it'll go to your TFS Server, find the build type you've specified, download the configuration from source control (the current checked in version) and build based on that. Which I think is really neat.Fix your DLL referencesYes, I know, this is pretty much the whole point of an automated build. But still. I suffered a couple of times with DLL references.We have a bunch of 3rd party and legacy DLL 's that we reference from our current project, which is fine. We added them to a source controlled folder, everything's happy.
What about the Data Dude?  No built-in scheduler
It’s not a big deal really, but before spending half the morning looking for it, know that it's not there to be found. You'll just have to schedule it to run via Windows' task scheduler.
How about a little notification?
After a little reading I discovered the Alerts system built into team foundation server (I've never really noticed it before). All I needed to do was go Team->Project Alerts... check on the "A build completes" alert and type in my email address. Every time the team build completes, I get an email with a link to a build results webpage \m/.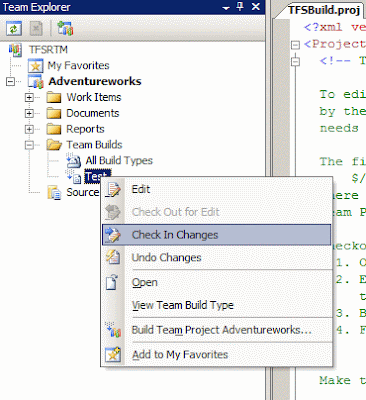
If you have a database project that you want to deploy every time your build runs, add this line in your “AfterDropBuild” target:

However if you have more than a Database; for example you have a different database for each environment, you will need to create more than one configuration:
· Click Configuration Manager on the Build menu.
· In the row corresponding to you Database project click the arrow under the Configuration and click “new”.
· Name your new configuration and save it.
· In Solution Explorer, click your database project.
· On the View menu, click Property Pages. You can also click ProjectName Properties on the Project menu.
· Click the Build tab. And start customizing your configuration.Use the following script to deploy your database project according to the customized configuration you have created
 No built-in scheduler
It’s not a big deal really, but before spending half the morning looking for it, know that it's not there to be found. You'll just have to schedule it to run via Windows' task scheduler.
How about a little notification?
After a little reading I discovered the Alerts system built into team foundation server (I've never really noticed it before). All I needed to do was go Team->Project Alerts... check on the "A build completes" alert and type in my email address. Every time the team build completes, I get an email with a link to a build results webpage \m/.
Dont Forget to check-in
After creating the buil and customizing it to your preferences dont forget to check it in so that changes will take affect.

2 comments:
Well written article.
Thank you, am glad you liked it :)
Post a Comment